Showing posts with label Castle Creations. Show all posts

04 October 2018

Axial SCX10-II (AX90046) Castle Creations 10A BEC

It has been a while since I actually performed this upgrade, but as it was an upgrade on my main RC, I still wanted to do a write up on it.

While doing research on tyres, I came across some interesting info regarding the current draw of servos. I decided to measure what my servo was actually drawing from the ESCs built in BEC. And that was a bit of an eye opener. The 20+KG digital servo was nothing like the servos I had used in my tourers in the past. Peaks of 7A under load were no exception. The little 2A BEC inside the ESC would never be able to survive for long under that kind of load. So I needed an external BEC.

I visited my local hobby shop and purchased a Castle Creations 10A CCBEC and a Y-cable to modify so I could hook it up without modifying the cabling of the ESC itself. When I got home, I couldn't believe my luck. There was an envelope from Castle Creations in my mailbox. The Castle Link USB programmer they offered for free with my motor/ESC combo had arrived. Great timing, because it couldn't just be used to program my ESC, it would work on the CCBEC too. 

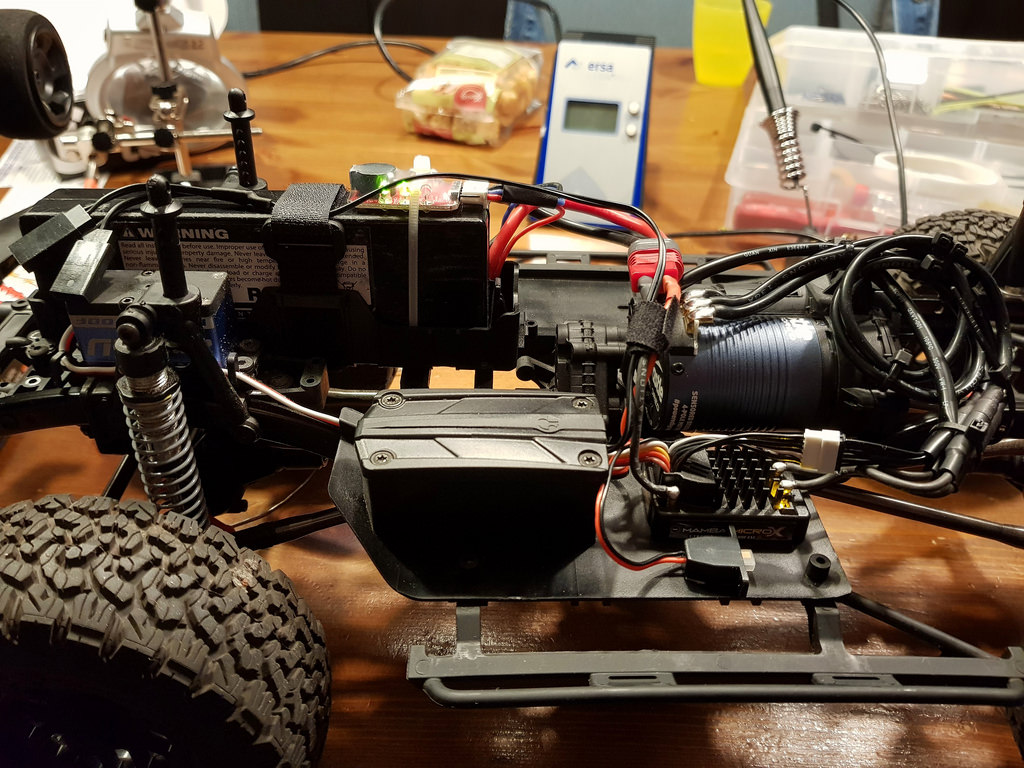
The installation was a pretty straightforward operation. First, I hooked up the CCBEC to my computer through the Castle Link to set it up. I set it to 6V as that's the limit of my servo. Next I made a Deans/T-connector pass through, and soldered it to the input wires of the CCBEC. And then, I cut the + on one end of the Y-cable. Hook that end up to the ESC. Hook the other end up to the output of the CCBEC and plug the remaining end into the RX. There was no way that RX, CCBEC and Y-cable, and of course all other required (and optional) cabling was goint to fit in the receiver box. So I modified an old battery storage box, mounted the CCBEC in that, and ziptied it to the right side plate. Not the cleanest installation, but it works and I was planning on cleaning up the cabling etc in the future anyway.

03 October 2018

Axial SCX10-II (AX90046) Motor/ESC upgrade

It has been a while since I actually performed this upgrade, but as it was an upgrade on my main RC, I still wanted to do a write up on it.

As you may have read in Part 3 of my review / build report of my Axial SCX10-II (which you can find here), the Surpass Hobby Platinum 3100KV motor and Hobbywing EZRun Waterproof 60A ESC wasn't ideal for crawler use. Even on 2S (which is what I run in most vehicles) it was way too aggressive for crawling. I got it to a point where it was usable by adjusting the settings on both the ESC and in my Radiolink RC3S transmitter. But while it was usable, it was far from smooth in the lower end of the RPMs. Well, that was to be expected from a sensorless brushless motor.

So, what was I going to replace it with? The fan on my EZRun was kind of annoying, so I knew I wanted a fanless ESC. And I wanted to have a good dragbrake which I could adjust to my personal preferences. I considered getting a Hobbywing Quicrun WP 1080 and a high turn count brushed motor. That setup would meet my wishes, no fan, 9 levels of drag brake. I wasn't sure about going back to brushed, but at less than €75 for all parts I needed, it sure was an attractive option.

Then I stumbled across a nice little combo from Castle Creations. A brushless, sensored, waterproof crawler-oriented motor/ESC combo, consisting of their 2280KV 1406 "Slate"-series motor and the Crawler edition of their Mamba Micro X ESC. This too ran without a fan, but what really convinced me was the additional AUX-channel, which when hooked up to a free channel on your RX, allows to adjust a setting on the fly. And the dragbrake was one of the settings it could be applied to. At €200, it was quite a bit more expensive than the brushed setup, and waterproofing the sensorcable would provide me with some other challenges. But I decided to go for it.

The next day, my new toys arrived

I made the installation process a bit harder for myself than it should have been. I could have easily taken out the gearbox and work on it replacing the motor without anything else being in the way. But I didn't... To make matters worse, one of the screws of the spur gear cover was stripped (I might have mentioned the quality of the hardware before). by glueing a hex key in the screw, I managed to loosen it about 1.5 turns. That gave it enough space to carefully bend the cover out and flip it out of the way.

The motor swap was peanuts after that. Take off the pinion, loosen 2 screws, take out the old motor, put in the new motor, install the pinion, adjust the meshing, tighten everything up and done. Replacing the ESC was a matter of minutes too, as it is just stuck onto the sideplate with double sided tape. Cables were put in the receiver box and the ESCs AUX-channel was hooked up to channel 3 (VR) of my RX. A quick test to confirm everything works and then close up the receiver box and spur gear cover.

Cables need some cleaning up, but it works.

Wow, what a difference. So smooth, so much control in the low end. Not to mention the torque this thing produces. It was a big investment as it was half the price of the kit itself, but it was very much worth it.